No?
I like to bake.
For many years, I stuck to simple recipes that didn't involve yeast and all its attendant complications. I admit it - an organism the size of a grain of sand intimidated me. I always adored fresh bread, though, and wished I could learn to make it...if only there wasn't that pesky yeast.
I wasn't alone...I know plenty of people who won't even risk a bread machine. Shoot, I know a couple of folks who won't even buy those frozen loaves of dough you just put in the oven.
I finally got past my aversion to cooking with yeast when I really, really wanted to make cinnamon rolls from scratch rather than from a tube. The recipes called for yeast. Oh, dear. Well...I did it. And then I did it again. And then I decided that I could brave the big one...bread.
Basic bread is simple, smells amazing, and when eaten warm from the oven with butter melting over it, drizzled with honey, and sprinkled with cinnamon? Pure gustatory bliss.
Give it a try - you won't be sorry!
 The Cast:
Up to 6 cups flour (I use White Lilly unbleached bread flour, but regular all purpose will work fine, too)
2 envelopes active dry yeast
2 Tablespoons shortening
3 Tablespoons sugar
1 Tablespoon salt
2 cups very warm water (I add 1 cup boiling water to 1 cup chilled water taken from the refrigerator dispenser) no hotter than 110 degrees F
1/4 cup melted butter
Before you start, lightly oil a large bowl and set it aside. Line a large cookie sheet with Release foil or brush it liberally with melted butter and set it aside.
In a bowl (I use my mixer, but you can use your hands if you like), layer 1 cup flour, shortening, another cup flour, yeast, another cup flour, and the salt and sugar. Mix them until they look a bit like meal, or basically until the shortening is somewhat evenly distributed in the flour mixture. Slowly pour in the water while mixing on low speed.
 Mix on low speed for one minute, then on medium speed for one minute. While that's happening, lightly flour a large cutting board or your work surface.
 Exchange the whisk for the dough hook and add one cup of flour. Mix on medium-low until the flour is fully incorporated. Add another cup of flour and repeat.
Now...aside from not killing the yeast with -too hot water, or not reviving the yeast with too-cold water, adding the right amount of flour is the trickiest part of bread making. And it's not that tricky. At this point, you are almost done. The dough will likely be crawling up the hook or forming something sort of ball shaped in the bowl. Give it a touch. Go one, I'll wait.
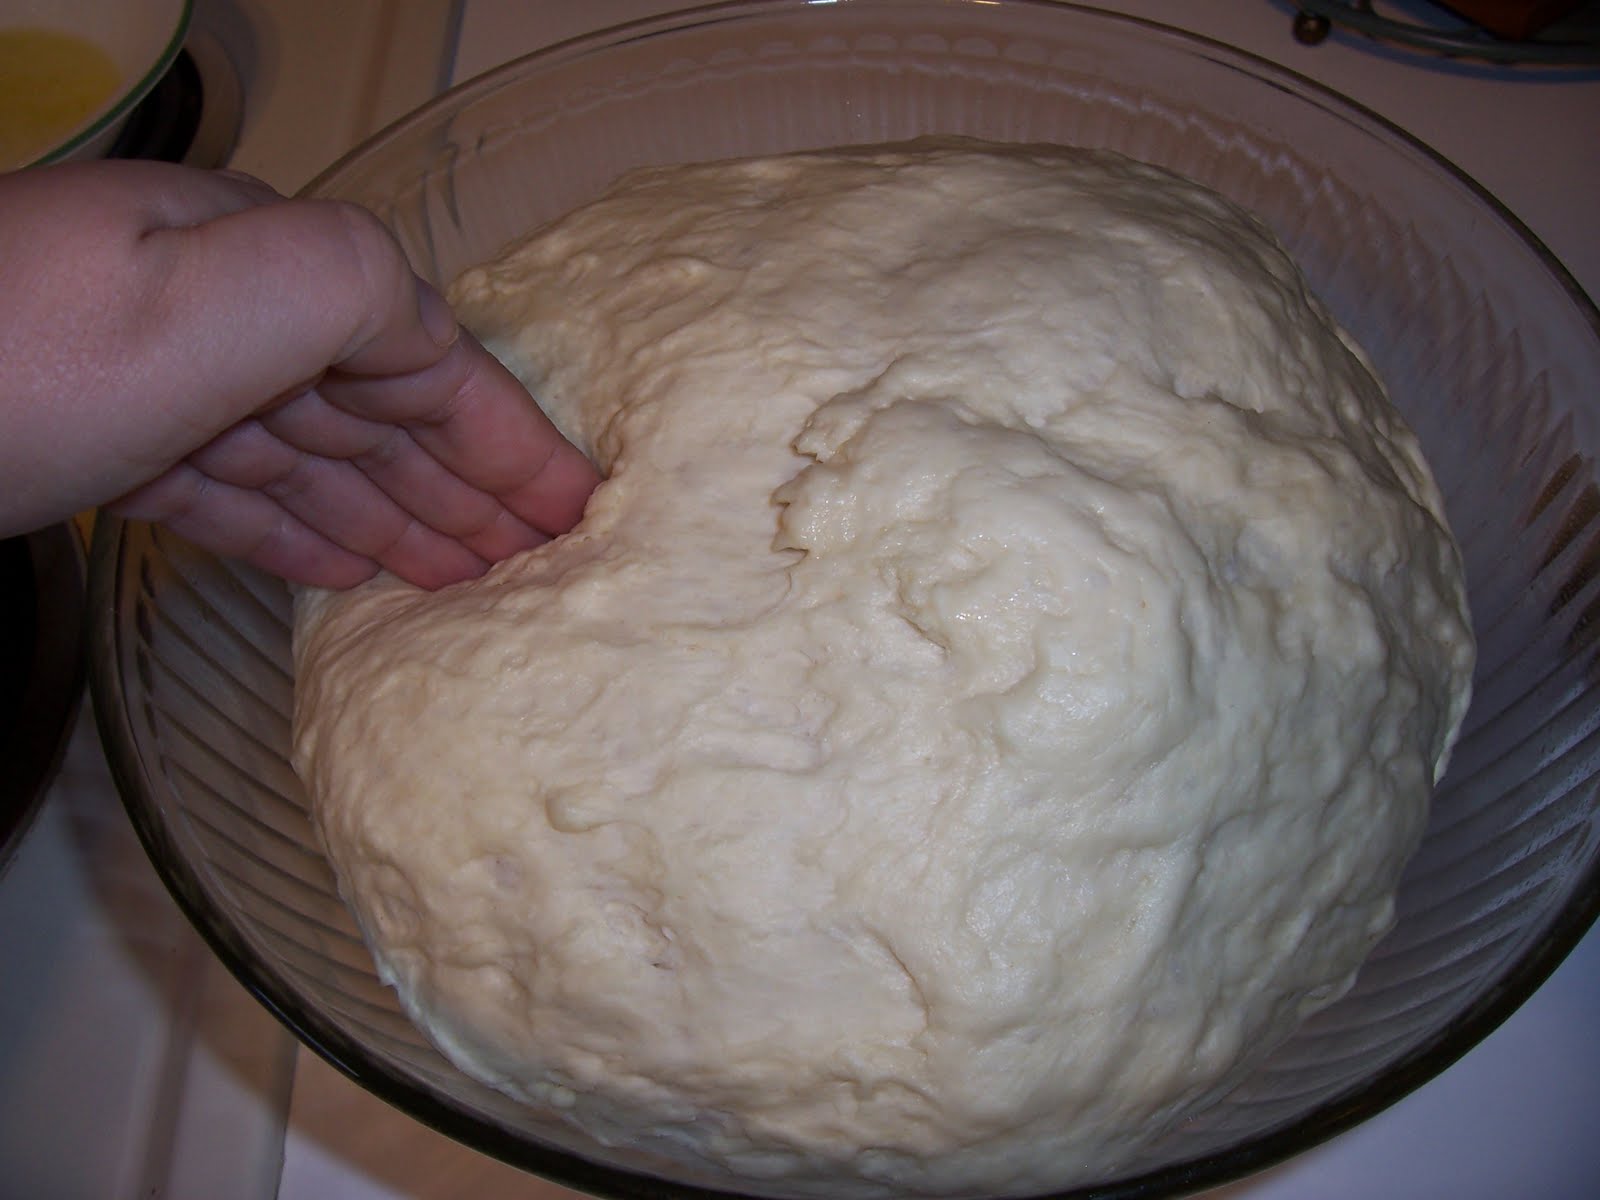
Yep...it's warm and springy and probably still a little sticky at this point. You've made a living thing. Cool, huh?
If you touch the dough and it sticks to your finger...
 ...you need more flour. Add a half cup and mix again. I have never had to go past this point with flour. Give it a poke again. It should be a little springy and not stick to your finger. Add another half cup of flour if you must. If it's just a tiny bit sticky, though, no fear - it's better to have a little less flour than too much. Too much means tough, dry, crumbly bread...boo.
 See? It's making a kind of ball.
Pull the dough from the hook...
 ...and get ready for one of the best things about baking bread - the kneading. Ohmuhgodness, this is better than therapy. It's warm, soft, elastic, already smells lovely, and there's just something tremendously satisfying about the whole thing.
Knead until the dough is smooth and elastic, three to five minutes.
Form the dough into a ball and place it in the oiled bowl. Roll it around and make sure the entire surface of the ball is oiled. You don't want it drying out!
 Cover the bowl with plastic wrap and place it in a warm place to rise.
Rising bread is an alchemical wonder.
For the love of all that's holy, leave the poor thing alone for at least forty minutes, or until it has doubled in size. This is where the yeast gets really busy doing its yeasty thing, which will in turn help make your bread light, smooth, and lovely.
 Look at that...it's gorgeous, I tell ya.
Using your finger tips, divide the dough in half. It will de-poof during this process, but don't worry...it'll all come out right in the end.
 Thank goodness I cleaned my fingernails before shooting these photos. honestly, I don't know how they get so dirty, but sometimes I'm shocked...shocked I tell you...at the state of them!
 Why am I suddenly thinking about Mick Jagger and Angelina Jolie??
 Take one of the dough pieces and knead it again five or six time. I don't even bother with the board, just hold it on my hands and sort of fold it in on itself, then make a ball and place it on the cookie sheet. Repeat with the other piece of dough.
 It's about the size of a large grapefruit or pumello, now. Brush the dough with melted butter. It'll thank you for the love.
 I keep my butter liquid and happy by putting the bowl on the back burner of the stove, where the oven vent is. It is warm enough to keep the butter melted but not so hot it damages the bowl or burns the butter, and I don't have to use the microwave and risk all kinds of buttery mayhem.
 Now that they've been buttered...
 ...go find something to do for another forty minutes while they rise to the occasion. They should double in size again.
Heat the oven to 425 F. You can pop them right into the oven, or you can inscribe a design on the surface of the loaves with a very sharp, smooth-edged knife. I usually make a star design.
 Bake at 425 for twenty minutes. Remove from the oven, but leave the oven on!
 Hey, look, they're kissing loaves! When they touch like that, I call 'em "kissing loaves" because it looks like they're kissing, duh. Don't worry of yours do this - it won't hurt anything.

 This bread is excellent as is, makes terrific sandwiches, is good for French toast, and is useful as a bowl for serving dips in, too. I made these loaves to turn into dressing on Thursday...if they last that long. Wrapped in freezer paper or kept in a Ziploc, it's good for a week or more.


3 comments:
Quite, quite impressive. Now, can you make chardonnay?
Mizz Susan, I cannot..I suggest you go check out noblepig.com for wine related goodness. Meanwhile. I may be learning to make mead one of these days...or at least, I may watch someone else learn to make mead...if that counts for anything.
Shade and Sweetwater,
K
I already had great gustatory appreciation for your breadly goodness... but your visual description of the process has brought my awe to a whole different level and I cannot wait until I am given the honor of consuming said bread (ha ha, I rhymed) tomorrow!! Cheers, wine or no!!
Post a Comment